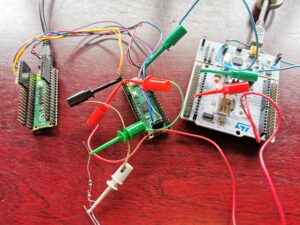
WindowsからのPicoデバッグ
Warning: Undefined array key "file" in /home/xs699219/neocode.jp/public_html/wp-includes/media.php on line 1788
Warning: Undefined array key 0 in /home/xs699219/neocode.jp/public_html/wp-content/plugins/urvanov-syntax-highlighter/class-urvanov-syntax-highlighter-settings.php on line 717
Warning: Undefined array key 0 in /home/xs699219/neocode.jp/public_html/wp-content/plugins/urvanov-syntax-highlighter/class-urvanov-syntax-highlighter-settings.php on line 717
Warning: Undefined array key 0 in /home/xs699219/neocode.jp/public_html/wp-content/plugins/urvanov-syntax-highlighter/class-urvanov-syntax-highlighter-settings.php on line 717
Warning: Undefined array key 0 in /home/xs699219/neocode.jp/public_html/wp-content/plugins/urvanov-syntax-highlighter/class-urvanov-syntax-highlighter-settings.php on line 717
Warning: Undefined array key 0 in /home/xs699219/neocode.jp/public_html/wp-content/plugins/urvanov-syntax-highlighter/class-urvanov-syntax-highlighter-settings.php on line 717
Warning: Undefined array key 0 in /home/xs699219/neocode.jp/public_html/wp-content/plugins/urvanov-syntax-highlighter/class-urvanov-syntax-highlighter-settings.php on line 717
Warning: Undefined array key 0 in /home/xs699219/neocode.jp/public_html/wp-content/plugins/urvanov-syntax-highlighter/class-urvanov-syntax-highlighter-settings.php on line 717
PC ⇔ Picoprobe ⇔ Pico 配線
PC ⇔ Picoprobe ⇔ Picoを配線します。
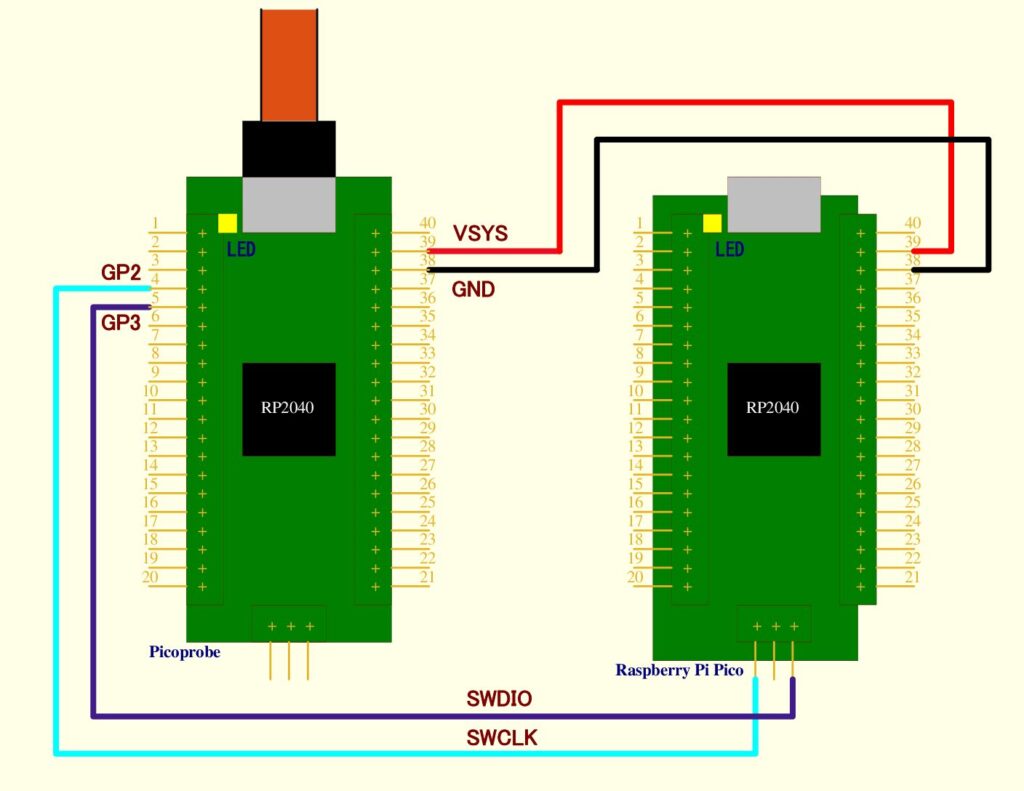
さきほどの「pico-examples入手とビルド」でビルドが成功しているならSWD経由で書き込むことができます。
今回はblink.elf(Lチカ)を書き込んでみます。
MSYS2(“MSYS2 64bit”→”MSYS2 MinGW 64 bit”)を起動して、以下のコマンドで書き込みます。
|
1 2 3 |
$ cd openocd $ cp /c/users/xxx/pico_work/pico-examples/build/blink/blink.elf . $ src/openocd -f interface/picoprobe.cfg -f target/rp2040.cfg -s tcl -c "program blink.elf verify reset exit" |
これで右側のpicoのLEDが点滅します。
VSCodeインストール、環境を整えてpicoデバッガー完成
Visual Studio Codeをダウンロードしてインストールします。
必要な拡張機能をインストールします。
|
1 2 3 |
c:\> code --install-extension marus25.cortex-debug c:\> code --install-extension ms-vscode.cmake-tools c:\> code --install-extension ms-vscode.cpptools |
VSCodeでデバッグを行うために設定ファイルを用意します。
pico-examplesフォルダー直下に”.vscode”フォルダーを用意してそこに”pico-examples\ide\vscode”フォルダー内の”launch-remote-openocd.json”を”launch.json”にリネームしてコピー、同様に”settings.json”をコピーします。
|
1 2 3 4 |
c:\users\xxx\pico_work\pico-examples> mkdir .vscode c:\users\xxx\pico_work\pico-examples> cd .vscode c:\users\xxx\pico_work\pico-examples\.vscode>cp ..\pico-examples\ide\vscode\launch-remote-openocd.json ./launch.json c:\users\xxx\pico_work\pico-examples\.vscode>cp ..\pico-examples\ide\vscode\settings.json ./settings.json |
コピーした”launch.json”の一部を変更します。
“gdbTarget”の”your-openocd”を”localhost”に、”gdbPath”にフルパスを入れます。
|
1 2 3 4 5 6 7 8 9 10 11 12 13 14 15 16 17 18 19 20 21 22 23 24 25 26 |
{ "version": "0.2.0", "configurations": [ { "name": "Pico Debug", "type":"cortex-debug", "cwd": "${workspaceRoot}", "executable": "${command:cmake.launchTargetPath}", "request": "launch", "servertype": "external", // This may need to be arm-none-eabi-gdb depending on your system // "gdbPath" : "gdb-multiarch", "gdbPath" : "c:/msys64/mingw64/bin/gdb-multiarch.exe", // Connect to an already running OpenOCD instance //"gdbTarget": "your-openocd:3333", "gdbTarget": "localhost:3333", "svdFile": "${env:PICO_SDK_PATH}/src/rp2040/hardware_regs/rp2040.svd", "runToMain": true, // Work around for stopping at main on restart "postRestartCommands": [ "break main", "continue" ] } ] } |
VSCode起動、デバッガースタート
準備が整ったので、VSCode、デバッガーを起動していきます。
まずpicoprobeとPCをUSB接続します。
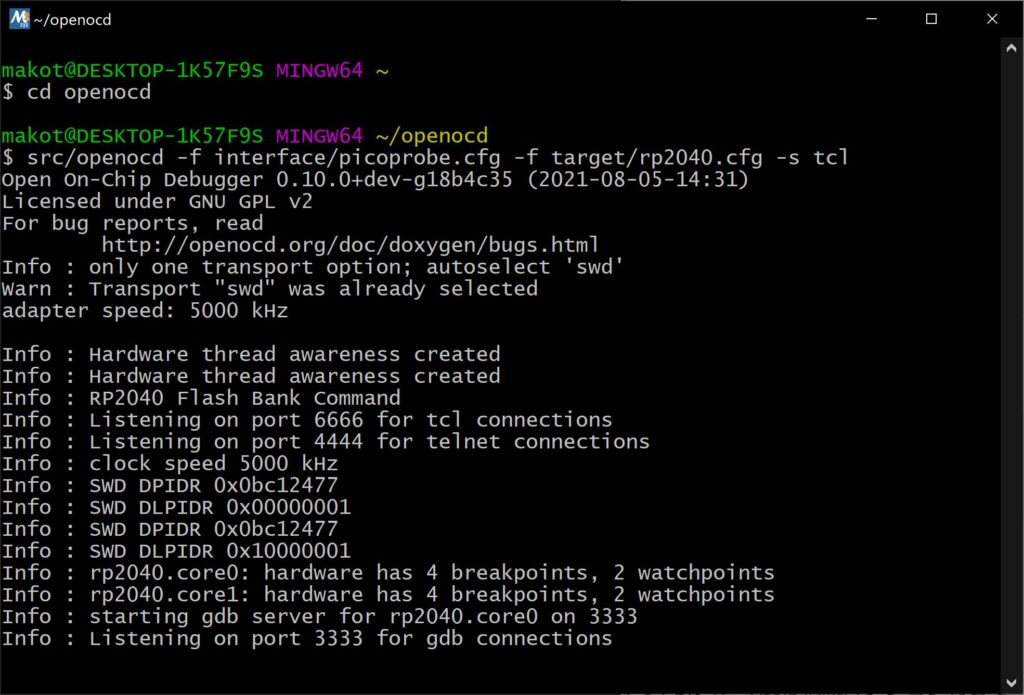
次にOpenOCDを起動します。 MSYS2を起動して(“MSYS2 64bit” →”MSYS2 MinGW 64 bit”)、今度は構成オプション付きでOpenOCDを起動します。
ですが、私の環境では”segmentation error”になります。ネットで調べるとlibusb-1.0.dllが1.0.24だとエラーするようなので1.0.23をダウンロードして”c:\msys64\mingw64\bin\libusb-1.0.dll”と入れ替えます。
そしてVSCodeを起動しますが、スタートメニューから起動するとビルドでエラーするので “Build Tools for Visual Studio 2019″(“Visual Studio 2019″→”Developer Command Prompt for VS 2019”)を起動してコマンドプロンプトに”code”と入力して起動します。
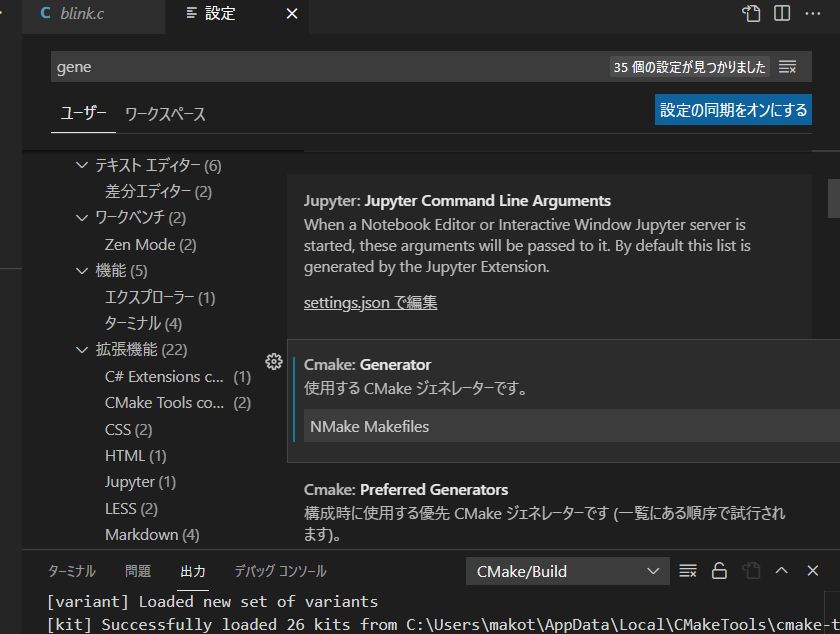
VSCodeはデフォルトではCmake Generatorに”ninja”を使ってしまうため、左下の”歯車マーク”→”設定”→”拡張機能”→”CMake Tools configuration”で「Cmake: Generator」に”NMake Makefiles”と設定します。またpico-sdkにPathを通すために「Cmake: Configure Enviromnet」に「項目」”PICO_SDK_PATH”、「値」”..\..\pico-sdk”を追加します。
そして「ファイル」→「フォルダーを開く…」で”pico-examples”フォルダーを選択します。そして左側の三角形に虫のアイコン、「実行とデバッグ」(Ctrl+Shift+D)を選択すると左上に緑の三角形と「Pico Debug」というドロップダウンリストがあらわれます。
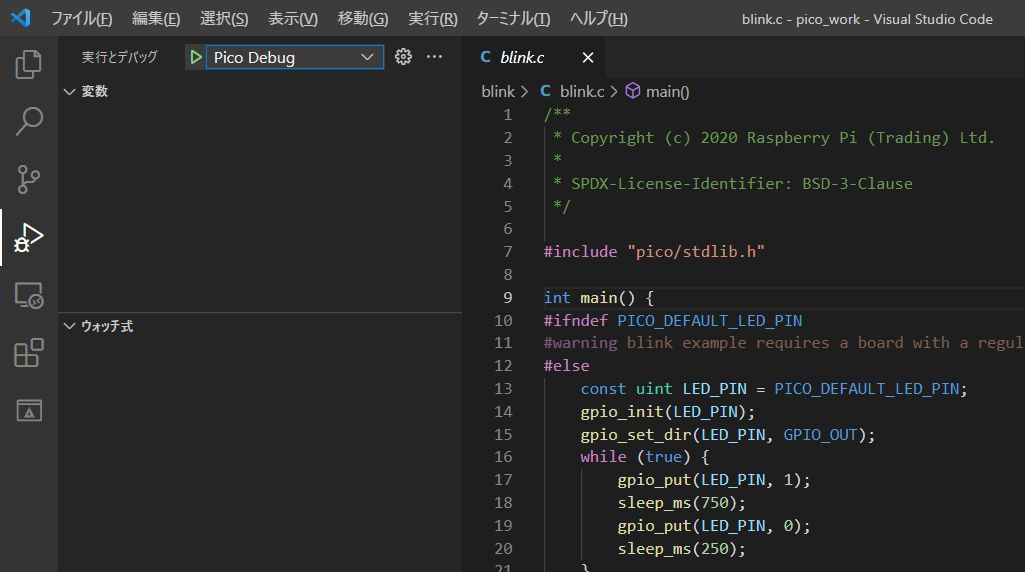
この緑の三角形を押すとデバッガーと接続してデバッグできるようになります。
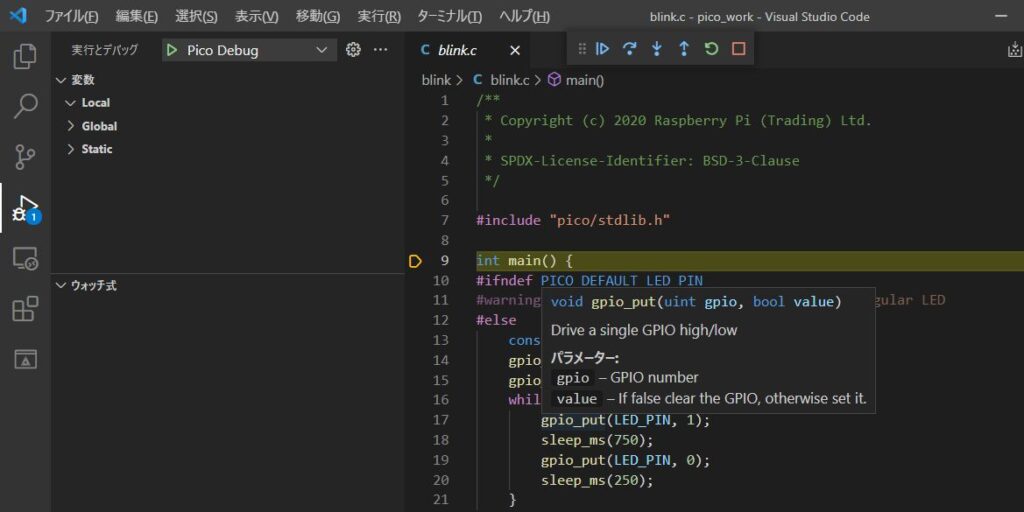
終わり


